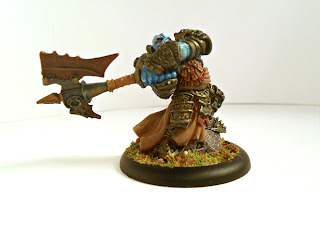
Today I want to talk about painting leather. To some this will seem like a basic concept, but to others it may just click that 'oh, yeah' area of the brain and help them with a project.
Painting leather starts with deciding if it will be a polished leather, or a dull more natural or worn leather. Polished leathers tend to be 'shiny' with more obvious highlights than worn/natural leathers. The next step is deciding on the color for the leather. Many choose to go with browns or blacks, but you can actually do any color you wish to fit with your ideas on the work you are doing.
Next you need to decide on how you are going to do the painting. Base>shade>highlight, Shade>mid-tone>highlight, or some other way that works for you. Lately I've been going with shade>mid>highlight, as it allows me to build the highlights more naturally from the shaded darker areas.
Something that should be stressed, thin, your, paints. If you want to blend layers well you need to thin the paints down to the consistency of skim milk, basically water with some pigment coloring it. Dip the brush, brush off excess (leave a wet trail on a napkin/paper towel) then blend towards edges starting in recessed areas. This allows you to build up the color in a more natural and translucent manner. And gives the painted area a much more realistic look.
With polished leathers you may wish to seal up the finished work with a matte sealer, then using a liquid gloss or satin sealer with a brush on the leather areas to bring back the 'shine'. Or you can leave it with a matte sealer (with stark enough highlighting at the extreme edges a matte sealer will not take away from the 'shine').
And as the post title says, some finished work.
I finished up the Trollblood warlocks I was working on and here they are.
Next post will be the finished work on the Salamanders project, and WIP picks of my Death Talon Cavalry!


No comments:
Post a Comment